Cómo instalar Lighttpd con PHP y MariaDB en CentOS/RHEL 8/7
Lighttpd es un servidor web de código abierto, seguro, rápido, flexible y más optimizado diseñado para entornos de velocidad crítica con menor utilización de memoria en comparación con otros servidores web.
Puede manejar hasta 10,000 conexiones paralelas en un servidor con una administración efectiva de la carga de la CPU y viene con un conjunto de funciones avanzadas como FastCGI, SCGI, autenticación, compresión de salida, reescritura de URL y muchas más.
Lighttpd es una excelente solución para cada servidor Linux, debido a su infraestructura io de alta velocidad que nos permite escalar un rendimiento varias veces mejor con el mismo hardware que con otros servidores web alternativos.
En este tutorial, explicaremos cómo instalar Lighttpd con PHP, PHP-FPM y MariaDB en < DistribucionesCentOS/RHEL 8/7 con nombre de host linux-console.net y dirección IP 192.168.0.103.
Paso 1: Instale el servidor web Lighttpd
1. Para instalar Lighttpd, primero debe actualizar los paquetes de software de su sistema y los repositorios disponibles usando el siguiente comando yum.
yum -y update
2. A continuación, debe habilitar el repositorio EPEL en su sistema y actualizar los paquetes de software utilizando los siguientes comandos.
yum -y install epel-release
yum -y update
3. Una vez que haya habilitado el repositorio EPEL, ahora puede instalar Lighttpd ejecutando el siguiente comando.
yum install lighttpd
4. Una vez instalados los paquetes Lighttpd, puede iniciar y habilitar el servicio para que se inicie automáticamente en el momento del arranque y asegúrese de verificar el estado utilizando los siguientes comandos.
systemctl start lighttpd
systemctl enable lighttpd
systemctl status lighttpd
5. Ahora verifique la versión de Lighttpd instalada en su sistema usando el siguiente comando.
lighttpd -v

lighttpd/1.4.55 (ssl) - a light and fast webserver
6. Ahora necesitas permitir el tráfico HTTP y HTTPS en tu firewall.
firewall-cmd --permanent --zone=public --add-service=http
firewall-cmd --permanent --zone=public --add-service=https
firewall-cmd --reload
7. Ahora abra su navegador y seleccione la siguiente URL para ver su servidor web Lighttpd funcionando.
http://Your-Domain.com
OR
http://Your-IP-addr
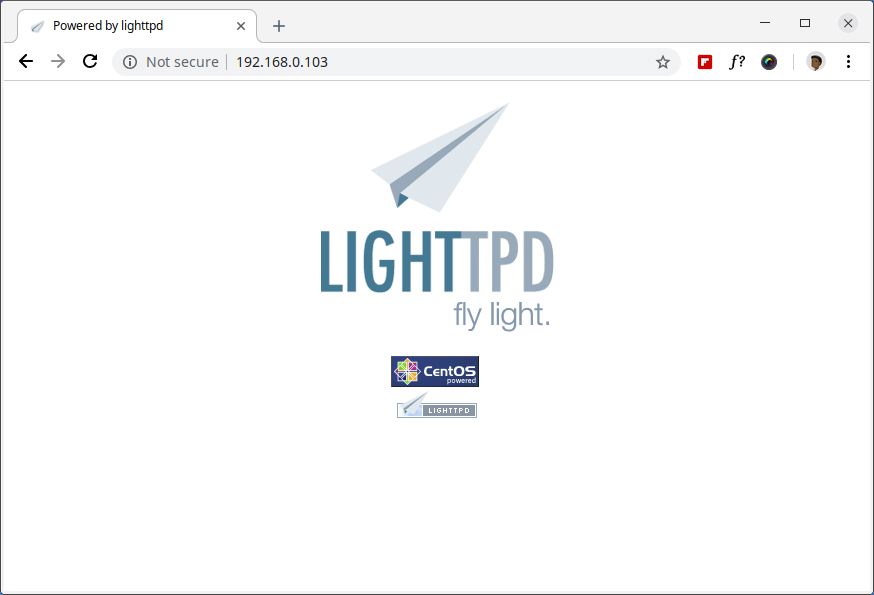
El directorio raíz de documentos predeterminado para Lighttpd es /var/www/lighttpd/ y el archivo de configuración principal se encuentra en /etc/lighttpd/lighttpd.conf.
Paso 2: Instalar MariaDB como MySQL en CentOS 7
8. A continuación, instale la compatibilidad con MySQL para Lighttpd utilizando los siguientes comandos.
yum -y install mariadb mariadb-server
9. Una vez completada la instalación, inicie, habilite y verifique el estado de MariaDB usando los siguientes comandos.
systemctl start mariadb.service
systemctl enable mariadb.service
systemctl status mariadb.service
10. Finalmente, deberá proteger su instalación de MariaDB emitiendo el siguiente comando.
mysql_secure_installation
Se le harán algunas preguntas diferentes sobre su instalación de MariaDB y cómo le gustaría protegerla. Puede cambiar la contraseña del usuario raíz de la base de datos, deshabilitar la base de datos de prueba, deshabilitar los usuarios anónimos y deshabilitar el inicio de sesión raíz de forma remota.
Salida de muestra
NOTE: RUNNING ALL PARTS OF THIS SCRIPT IS RECOMMENDED FOR ALL MariaDB
      SERVERS IN PRODUCTION USE!  PLEASE READ EACH STEP CAREFULLY!

In order to log into MariaDB to secure it, we'll need the current
password for the root user.  If you've just installed MariaDB, and
you haven't set the root password yet, the password will be blank,
so you should just press enter here.

Enter current password for root (enter for none): Enter OK, successfully used password, moving on... Setting the root password ensures that nobody can log into the MariaDB root user without the proper authorization. Set root password? [Y/n] y New password: Re-enter new password: Password updated successfully! Reloading privilege tables.. ... Success! By default, a MariaDB installation has an anonymous user, allowing anyone to log into MariaDB without having to have a user account created for them. This is intended only for testing, and to make the installation go a bit smoother. You should remove them before moving into a production environment. Remove anonymous users? [Y/n] y ... Success! Normally, root should only be allowed to connect from 'localhost'. This ensures that someone cannot guess at the root password from the network. Disallow root login remotely? [Y/n] y ... Success! By default, MariaDB comes with a database named 'test' that anyone can access. This is also intended only for testing and should be removed before moving into a production environment. Remove test database and access to it? [Y/n] y - Dropping test database... ... Success! - Removing privileges on test database... ... Success! Reloading the privilege tables will ensure that all changes made so far will take effect immediately. Reload privilege tables now? [Y/n] y ... Success! Cleaning up... All done! If you've completed all of the above steps, your MariaDB installation should now be secure. Thanks for using MariaDB!
11. Intente conectarse al servidor MySQL y revise las bases de datos existentes en su servidor de bases de datos con los siguientes comandos en la terminal.
mysql -u root -pSalida de muestra
Enter password:
Welcome to the MariaDB monitor.  Commands end with ; or \g.
Your MariaDB connection id is 10
Server version: 5.5.60-MariaDB MariaDB Server

Copyright (c) 2000, 2018, Oracle, MariaDB Corporation Ab and others.

Type 'help;' or '\h' for help. Type '\c' to clear the current input statement.

MariaDB [(none)]> show databases;
+--------------------+
| Database           |
+--------------------+
| information_schema |
| mysql              |
| performance_schema |
+--------------------+
3 rows in set (0.00 sec)

MariaDB [(none)]>
Paso 3: Instalar PHP y PHP-FPM con FastCGI en CentOS 7
12. Para habilitar PHP-FPM con soporte FastCGI, primero debe instalar PHP junto con las extensiones necesarias. usando el siguiente comando.
yum -y install php php-mysqlnd php-pdo php-gd php-mbstring
13. Una vez instalado PHP, habilite ahora la compatibilidad con PHP-FPM y FastCGI para Lighttpd >, para hacer esto también necesitas instalar estos paquetes.
yum -y install php-fpm lighttpd-fastcgi
14. Ahora abra un archivo llamado /etc/php-fpm.d/www.conf.
vi /etc/php-fpm.d/www.confEstablezca el usuario y el grupo en Lighttpd.
; Unix user/group of processes
; Note: The user is mandatory. If the group is not set, the default user's group
;       will be used.
; RPM: apache Choosed to be able to access some dir as httpd
user = lighttpd
; RPM: Keep a group allowed to write in log dir.
group = lighttpd
Además, PHP-FPM utiliza de forma predeterminada el socket /var/run/php/php7.0-fpm.sock, es necesario crear PHP-FPM. para utilizar una conexión TCP. Haga que la línea listen tenga el siguiente aspecto:
;listen = /var/run/php/php7.0-fpm.sock
listen = 127.0.0.1:9000
15. Ahora inicie el servicio PHP-FPM y asegúrese de habilitarlo para que se inicie automáticamente en el momento del arranque usando los siguientes comandos.
systemctl start php-fpm.service
systemctl enable php-fpm.service
Paso 4: Habilitar PHP y PHP-FPM con FastCGI en Lighttpd
16. Aquí, necesitamos modificar tres archivos /etc/php.ini, /etc/lighttpd/modules.conf y /etc/lighttpd/conf.d/fastcgi.conf para habilitar la compatibilidad con PHP para Lighttpd.
Abra el primer archivo /etc/php.ini.
vi /etc/php.iniQuite el comentario de la siguiente línea que dice línea cgi.fix_pathinfo=1.
; cgi.fix_pathinfo provides *real* PATH_INFO/PATH_TRANSLATED support for CGI.  PHP's
; previous behaviour was to set PATH_TRANSLATED to SCRIPT_FILENAME, and to not grok
; what PATH_INFO is.  For more information on PATH_INFO, see the cgi specs.  Setting
; this to 1 will cause PHP CGI to fix its paths to conform to the spec.  A setting
; of zero causes PHP to behave as before.  Default is 1.  You should fix your scripts
; to use SCRIPT_FILENAME rather than PATH_TRANSLATED.
; http://php.net/cgi.fix-pathinfo
cgi.fix_pathinfo=1
Luego abra el segundo archivo llamado /etc/lighttpd/modules.conf.
vi /etc/lighttpd/modules.confQuite el comentario de la siguiente línea que dice incluir “conf.d/fastcgi.conf”.
##
## FastCGI (mod_fastcgi)
##
include "conf.d/fastcgi.conf"
A continuación, abra el tercer archivo llamado /etc/lighttpd/conf.d/fastcgi.conf.
vi /etc/lighttpd/conf.d/fastcgi.confAhora agregue el siguiente contenedor al final del archivo y guárdelo.
fastcgi.server += ( ".php" =>
        ((
                "host" => "127.0.0.1",
                "port" => "9000",
                "broken-scriptfilename" => "enable"
        ))
)
Reinicie el servicio Lighttpd para reflejar los cambios y habilitar la compatibilidad con PHP.
systemctl restart lighttpd
Paso 5: Probar PHP y PHP-FPM con soporte FastCGI en Lighttpd
17. Como dijimos anteriormente, la raíz del documento predeterminada para Lighttpd es /var/www/lighttpd/. Entonces, aquí crearemos un archivo phpinfo.php en este directorio.
vi /var/www/lighttpd/info.phpAgregue las siguientes líneas. Este pequeño fragmento de código mostrará información sobre la instalación de PHP con sus versiones.
<?php
phpinfo();
?>
18. Abra su navegador y navegue hasta los siguientes enlaces.
http://Your-Domain.com/info.php
OR
http://Your-IP-addr/info.php

Verá información de trabajo de PHP, PHP-FPM y MySQL con muchos otros módulos que ya están habilitados.